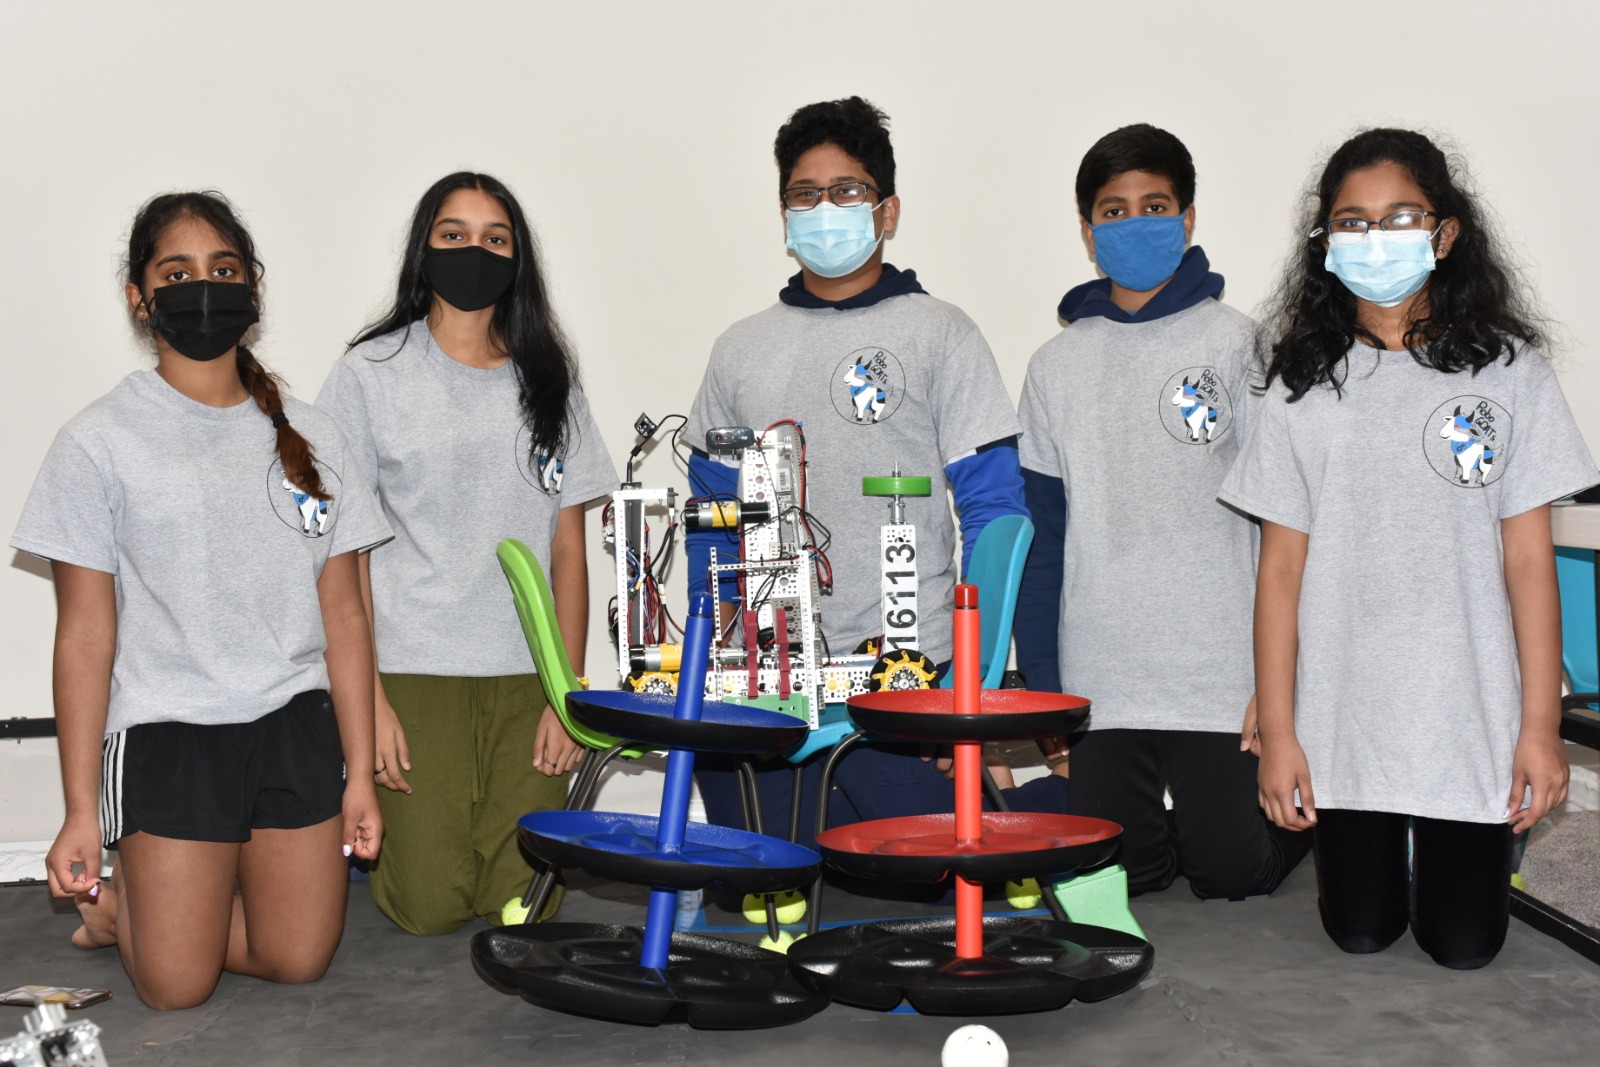
RoboGOATS Engineering Notebook
Team 16113
Table of Contents
Coaches: 4
Sensors and Computer Vision: 11
Outreach: 12
Team Introductions:
Abhi P: My name is Abhi Purohit and I am a 9th grader at North Creek High School. This is my first year in FTC and my role is the driver and I build the attachments. I like building things and I also enjoy doing some coding. I have always been interested in robotics as I had taken 2 years of it during middle school and thought it was fun. FTC was a good opportunity to learn how to program and build a robot to complete various tasks and it definitely has been fun to watch the robot do those things after working hard to get it where it is right now.
Aaryan D: Hello, my name is Aaryan, one of the new members of RoboGOATS. I’m a 7th grader who attends Pacific Cascade Middle School. I wanted to join this team since I have an interest in programming and engineering. In general, my job on the team is to build attachments and help to test programs on our robot. In competitions, a teammate and I watch the gameplay of our team to see what mistakes or fouls they are making. This is so we can improve upon this next time. Also, if needed I am the substitute driver for our team.
Anvi K: Hi! My name is Anvi and I’m the team lead of RoboGOATS. I'm a 9th grader at North Creek High School, and I have done FTC for 2 years. I want to continue to do FTC because I’m always building things. Building new things and experimenting has always been one of my passions, and I hope participating in FTC will grow those passions into a greater ambition. I mainly work on the programming side, while also helping with testing the building side.
Anvi B: My name is Anvi Babu, I am in 6th grade in Skyview Middle School and this is my first year doing FTC. I have done FLL for three years and FLL Jr for 1 year. I got into robotics by watching my brother do FLL and FTC and getting interested. I both build and program on this team and I am the attachment driver.
Jasvitha S: My name is Jasvitha Senthilkumar and I am 11 years old. This is my first year of robotics FTC. I am a sixth-grader at Seattle Hill Elementary under Junior High. I have been interested in robotics ever since I was 8 but I didn’t show my interest until this year. I want to learn engineering and programming to apply that to my future career.
Our Coaches
|
Our coach, Dr. Srujana Karlapalem is a Physician Assistant Specialist in Bothell, Washington. She graduated with honors from University Of Washington School Of Medicine in 2013. Dr Srujana Karlapalem graduated with Bachelor of Medicine, Bachelor of Surgery (MBBS) from Gandhi Medical College, Secunderabad, India. Having more than 8 years of diverse experiences, especially in PHYSICIAN ASSISTANT, Dr. Srujana Karlapalem affiliates with Providence Health System. She has been coaching First LEGO League teams for the last seven years and First Tech Challenge team for the last three years. |
|
|
Our coach, Mr. Babu Govindarajan is working as Senior-Solution Architect with AT&T. He graduated with a Master of Engineering (Mechanical) from Guindy College of Engineering in 2000 and he also earned a Bachelor Degree in Civil and Structural Engineering. He has about twenty years of software development experience in India and the USA. He has been coaching First LEGO League teams for the last seven years and First Tech Challenge team for the last three years. He teaches Java programming, Machine Learning using Tensorflow, Computer Vision and Robot Mechanism and attachments. |
|
Team History:
RoboGOATS was started originally as one big team, called The Omega Squad in 2019. Over the 2020 and 2021 seasons, we gained new team members and decided to split the original team into two. Now, our team is formally known as the RoboGOATS. In August of 2019, a group of students was brought together by our coach, Babu Govindarajan for the Skystone season of FTC. We learned a lot about FIRST that year, through various student-led presentations of the rules and terms. This was our first year, so we were just learning and testing our skills with the basics of engineering and programming. We were nominated for some awards and ended up getting 3rd place in the Think Award category at the Interleague. We ended the year with a lot more knowledge than we started out with, and were ready to take on the challenge the next year. In August and September of 2020, we began to plan out our goals and design overview for the robot. We overcame many big challenges with the design but ended the year with a polished robot and refined skills. We held a big outreach meeting with local members of the community to teach them about FIRST, FTC, and our robot. It was a success and a big milestone for our team.
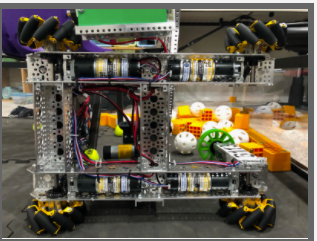
Robot
Overview:
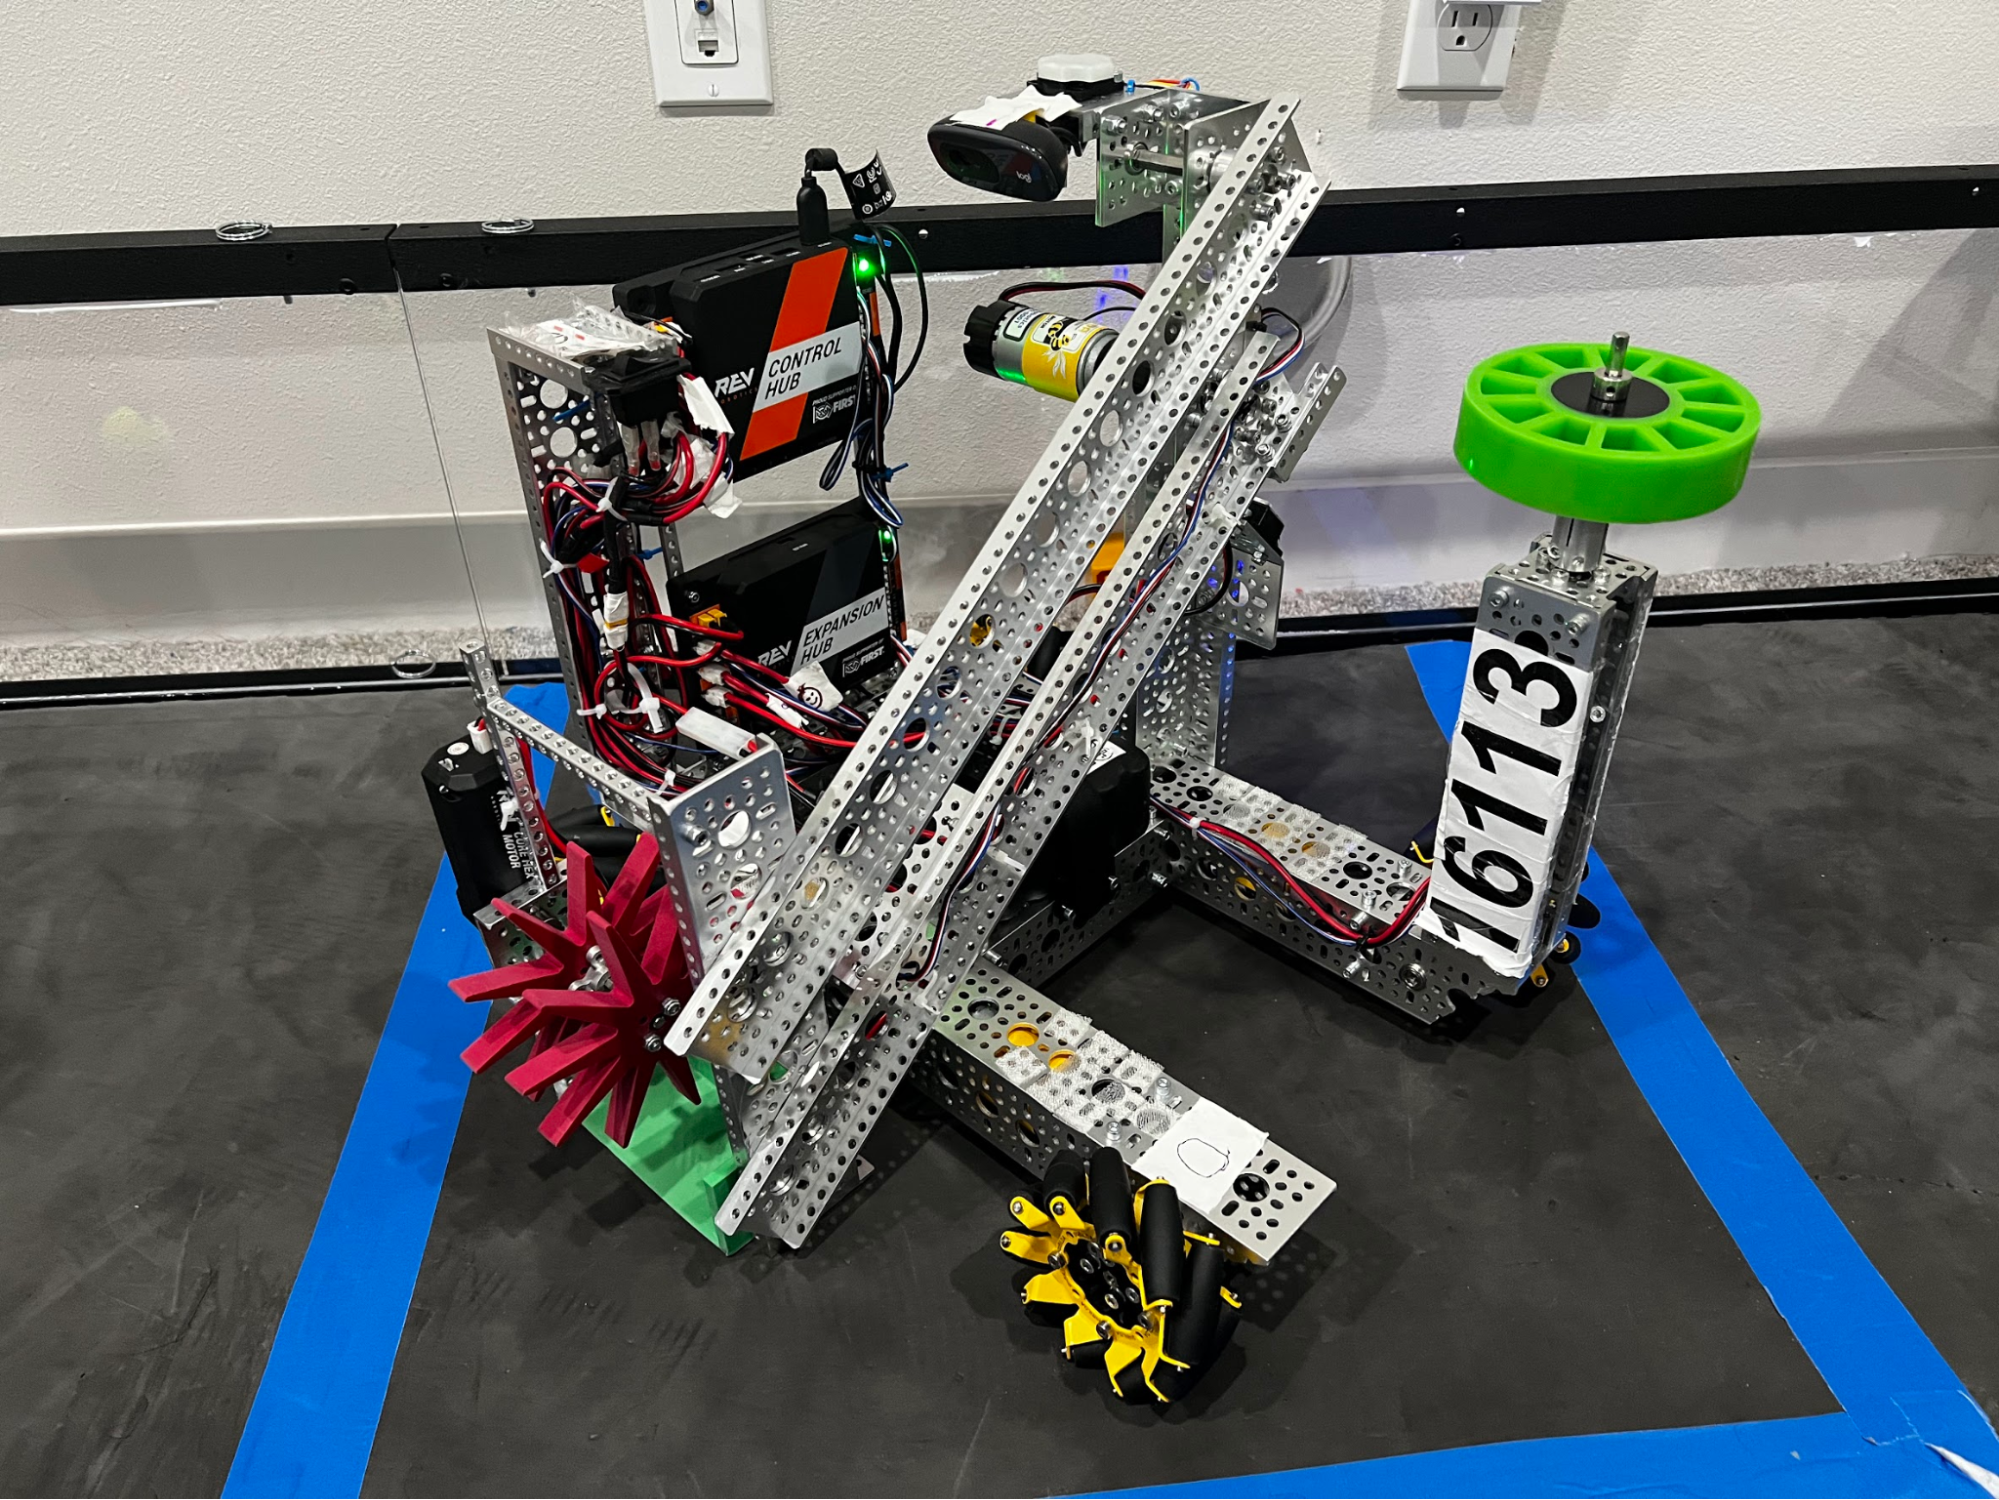
Base Robot:
For the base of our robot we used goBILDA’s Strafer Chassis Kit V4. The kit includes four Planetary Gear motors that power four 96mm Mecanum wheels. Our robot has a REV Robotics Control Hub and Expansion Hub to control our robot and a Logitech webcam that we use for machine learning.
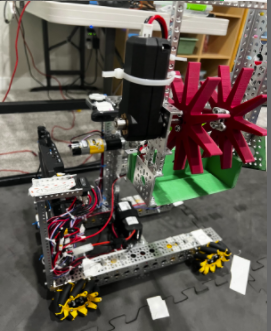
Carousel Wheel Mechanism:
Our carousel wheel mechanism is made up of a Planetary Gear motor, a Gecko/Compliant wheel from AndyMark, and multiple different channels. The mechanism is placed on the front of our robot to easily spin ducks off the carousel by rotating the carousel left or right at an even speed.
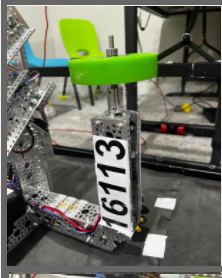
Arm Mechanism:
The arm mechanism consists of a lot of elements such as long channels, a 3D printed cradle, touch sensors, star wheels, and 2 different motors. Its purpose is to pick up and place freight on either of the Hubs. It does this by intaking blocks by spinning them into the cradle making use of the REV Robotics Core Hex motor and star wheels. The 3D printed cradle is used as a backing and smooth transition between the field and our robot. Once it has a piece of freight, the robot lifts the body of the arm using a Planetary Gear motor, drives to the desired location, and finally outputs the freight out by spinning the star wheels the opposite way.
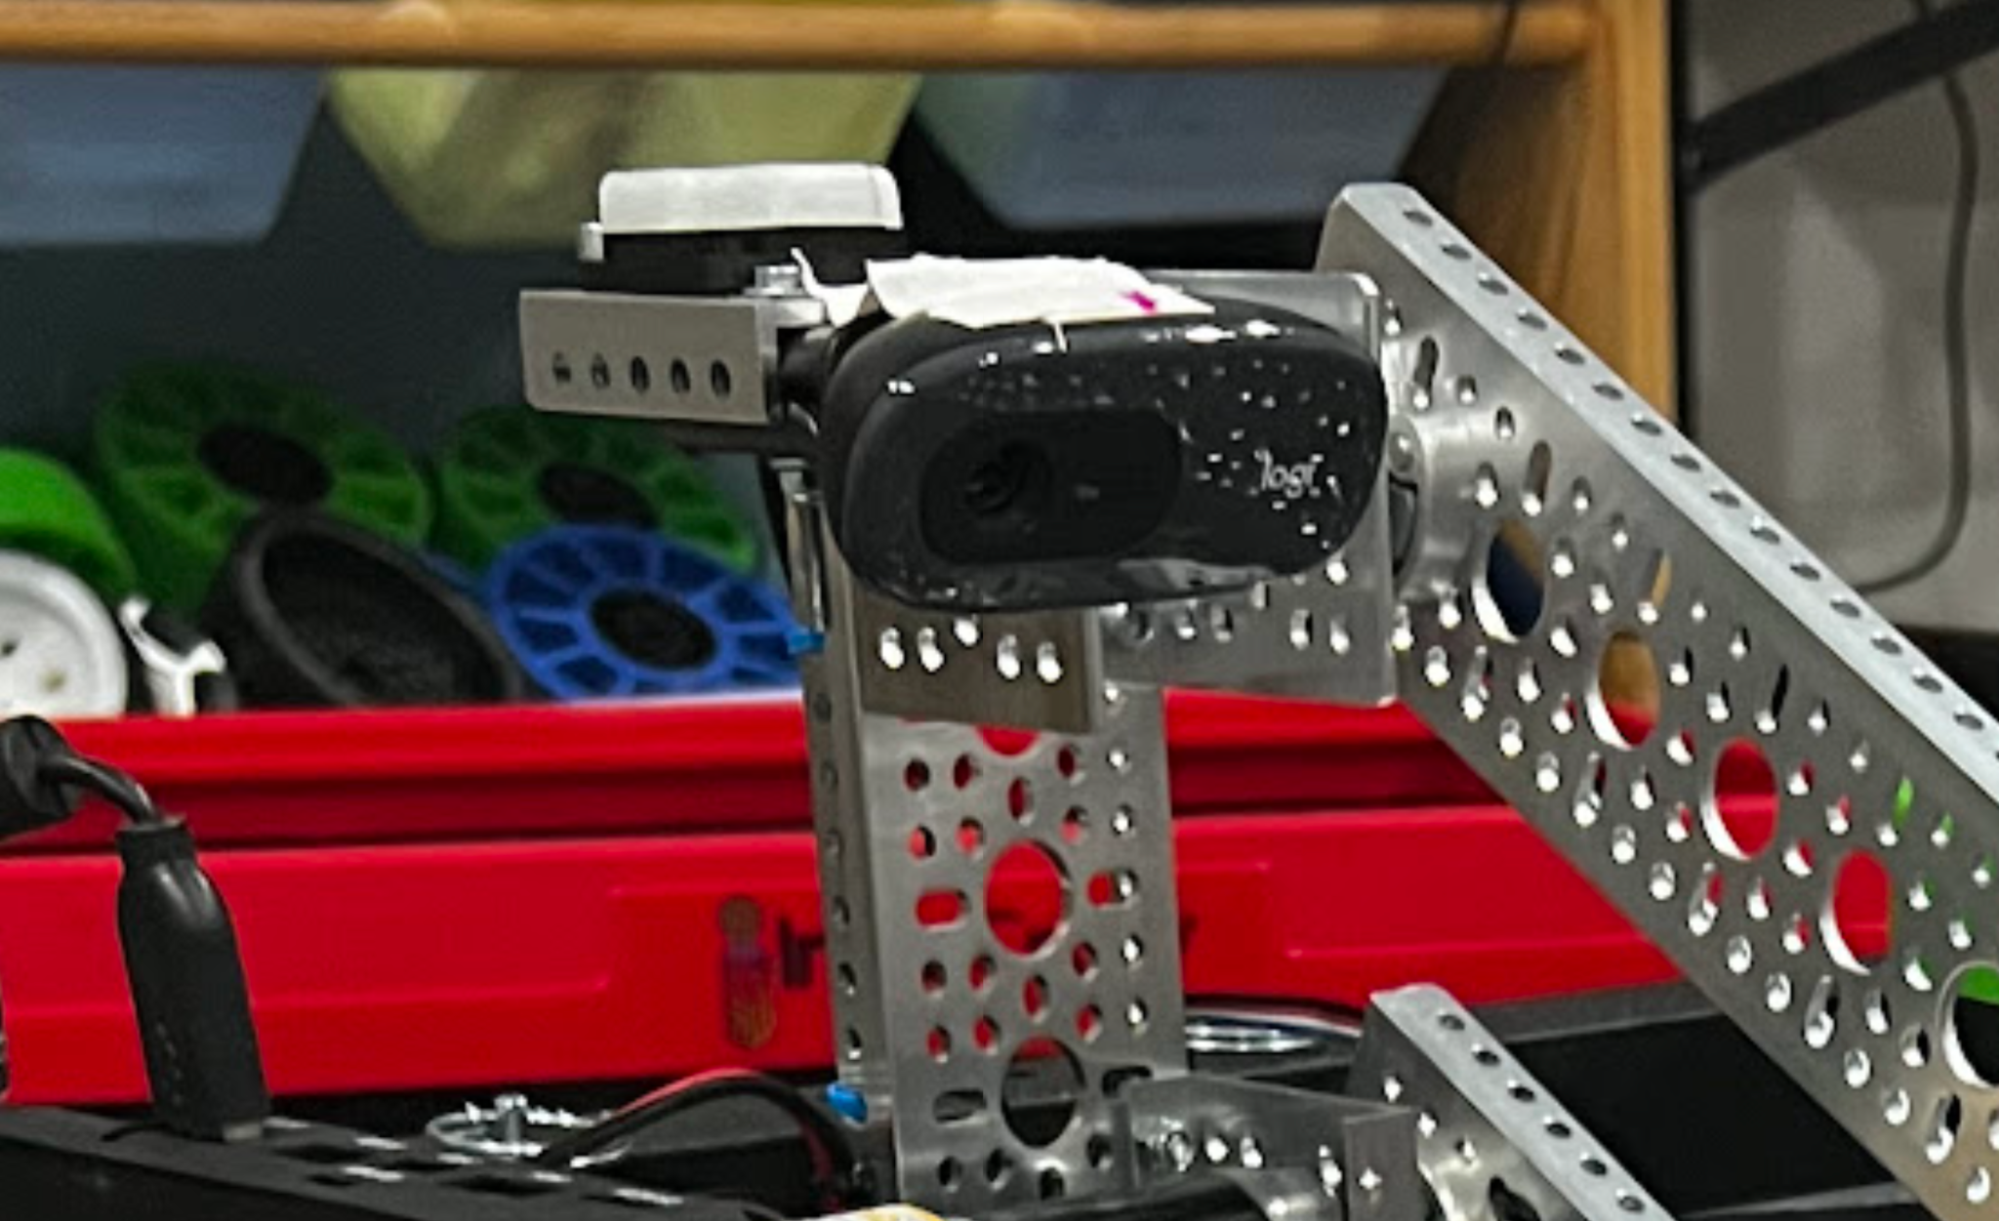
Webcam:
In the Autonomous period, we wanted to detect our Custom Shipping Element. To do this, we have a program that uses machine learning and makes use of a webcam to consistently detect where our shipping element is so we can place a block on the correct level during Autonomous mode and earn more points.
Hardware Integration:
With the attachments finally done, we could now start work on integrating them onto the robot itself. However, this was no easy task as we faced problems such as where to place the attachments and the struggle to stay within the limits of how big a robot could be. The first attachment our team decided to add was the carousel wheel. This is because it was relatively small and we would have a lot of room to add future attachments. To figure out where we wanted the wheel to be placed, we thought about where it would get the most control and not interfere with other attachments. Therefore, we decided to integrate the wheel on the front-left corner of the robot. We also decided this positioning would be helpful for our Autonomous mode to navigate.
With the wheel done, we could now work on placing our main attachment - the arm. This attachment was made in collaboration with our sister team - the Omega Squad (18015). Being the main attachment of our robot, the arm takes up a lot of space and was technically challenging to attach to the robot. For this reason, we had to plan out where and how we wanted to place the attachment beforehand so it would be easier to add later. After some thinking, we decided that the best place to integrate the arm would be on the left side of the robot as it would make placing blocks on the shared shipping hub much easier. Now that we had a plan, we began attaching the crane to the robot and made sure to add support using beams, and touch sensors where we wanted the robot to stop lifting. With this, we had completed integrating all of our mechanisms.
Engineering Process:
The Arm:
The development of our arm attachment started when our team noticed that we needed an attachment that could pick up and transfer blocks. Our team brainstormed some ideas and we decided that an arm attachment with some sort of intake system at the end would be the most suitable for our robot. Our first step to make this attachment was to design a 3D model of what we wanted, by taking some inspiration from other designs. Then we began finalizing our design by discussing how we wanted our arm to move and fit on the actual robot, while also adding specific measurements to the design.
With these steps done, we could focus on building the attachment. To do this, we first had to gather the parts that were in our design. For the parts we couldn’t find, we either found or made a replacement. Then, we began putting the arm together. However, this was much harder than we expected, as we ran into many problems along the way. These included pieces not fitting, motors not working, and the first design not functioning correctly. In spite of these problems, we continued to work on it and with enough attempts, finally had a functioning attachment.
To test the attachment, we saw if it could pick up all the weighted blocks. If not, we adjusted the arm by changing the motor strength and moving where the claw was. Also, when we tested the grabbing arm which grabs balls and cubes, it shook a lot. We got the idea to attach a low side U-channel piece to the base of the arm which connects to the base of the robot. When we tested it after modifying the arm, it stopped shaking and worked much better. The arm was still having trouble and we guessed that it was because of the DC motor hanging horizontally off the side adding weight to the system. To fix this, we took off the motor and replaced it with a much smaller motor positioned vertically with the intake system. After we tested it again it worked more efficiently and with ease. Overall, this was a very successful attachment for our team.
The Duck Spinner:
The carousel spinner is a big part of our score since we spin ducks in both autonomous and endgame. Our idea for the spinning wheel came from many attachment sketches at the beginning of the year. Many of us had the idea to use a wheel like a gear against the carousel to spin it. At first the DC motor was attached to 2 axles using a Hyper Coupler then a Gecko/Compliant wheel was attached. The whole structure was attached to the robot with a low side U-channel piece. When we tested it, the wheel kept on leaning back and it didn’t have enough support. To improve it we used 2 more low side U-Channel pieces and screwed on a Quad Block Motor Mount. We then screwed the motor to this mount and after that the whole thing was attached to the robot. When we tested the wheel again it worked well and didn’t shake or lean. We spent a lot of time adjusting the wheel to match up with the carousel height so it would work properly. We also worked on fixing the speed so it wouldn’t throw the ducks off or waste time going too slow.
Programming Prototype:
Prototyping the program started with creating a simple program for testing the drive motors controlling the wheels. First, we had to test each motor separately using the REV Hardware Interface, but once we got that working, the rest of the program went smoothly.
The attachment prototype programs were created quickly after that because we had the code from previous years to help us. We had to change some code to align with what our driver’s wanted, but we finalized the attachment programs after that.
After that, we wanted to incorporate computer vision into our Autonomous program. We encountered many challenges with this design because it required precise calibration and placement to work. Halfway through the day of the second league, we found a small error in the code that was affecting our whole Autonomous program. In the games, we saw that our program wasn’t responding to the code and always going to the lowest level. We saw the telemetry on the Driver Hub was correct, and that the program was actually sensing the block on the correct square, but wasn’t acting on it. After looking through every line of code in the program, we realized that we weren’t resetting the runtime after a crucial step. This made it so when we initialized the program at the beginning of the game and waited for longer than the allotted time, the program would run out of that time and never run the correct code when we actually started the program. After fixing this one problem, our Autonomous program started working consistently.
Still, we weren’t in the clear. Sometimes, when going to the lowest level in Autonomous mode to drop the block, our intake system would drag the Alliance Shipping Hub with it, giving us multiple huge penalties. We decided not to run the Autonomous program in the last couple of games because it was losing us more points than we could gain from it. We weren’t satisfied with this design, so immediately after the league, we started working on this.
After fixing that, we created a prototype program that would change our whole plan for Autonomous. Up until this point, our robot was shuffling against the wall and then moving forward to drop the block. We wanted to make a program more accessible for our alliance partner, so we created a prototype that would move forward and then shuffle to drop the block. This template was used on the other programs for both red and blue, and carousel and warehouse sides.
Programming Integration:
Integrating the program was quite a bit more difficult than just creating the prototype. We had to make sure everything we had created actually worked in harmony with what the building team had done. This required tons of testing and making small adjustments to the program. We first ran into some issues with the drive motors, as they weren’t configured correctly with the wheels. After playing around with the code and fixing the orientation of the wheels, we had a moving robot.
Then came the task of integrating the attachment programs with the designs on the robot. The program for the carousel wheel had to be calibrated to the correct speed, but we overcame that issue and quickly moved on. The intake system was quite easy because we had experience using DC motors in this kind of design, but lifting the arm required more work.
At first, we had a prototype design of the arm that had no sensors, but we quickly realized that we had to implement them due to the damage the arm was causing to the base robot. Programming the sensors was a big challenge, but we overcame it by testing small parts of it at once and then integrating it with the full robot.
First, we just tested the sensor with a small program that would tell us if it could recognize being pressed and then output a statement. Once we had that working, we looked at some sample code and our code from previous years to try to use the sensors at a larger scale. With numerous fixes of the orientation, configuration, and placement of the sensor, we finally had a working piece of code that would stop the arm attachment from breaking the base if it went too far.
This was all in the TeleOps mode, and we still had yet to attempt the code in the Autonomous mode. This proved to be a much bigger challenge. For some reason, our sensor program wasn’t working in this mode. We tried many different approaches but decided we were wasting our time and tried to find a solution that didn’t involve using the sensor in this period. We came up with a program design that lifted the arm to the top level but had just enough space so it wouldn’t interfere with our base robot. We tested this multiple times and found this method to be successful. Integration of the fixed Autonomous design required lots of testing with changing the distance the robot would go close to the Alliance Shipping Hub.
We also had to change the entire program when making it more accessible for our alliance team, which required lots of testing. Implementing this was very difficult because we had to change the program for both red and blue, and on the warehouse side as well.
Sensors and Computer Vision:
While most of our computer vision is used in the Autonomous period, sensors play a crucial role in lifting the arm attachment. We use REV Robotics sensors for all our needs. Initially, we were using 2 touch sensors to prevent the arm attachment from lifting too far up or too far down, but we realized we really only needed the top touch sensor. We had some trouble with the configuration of the touch sensor with the Driver Hub, and some of our wirings were off. After rewiring the sensor to the Digital channel on our Control Hub, we had a working touch sensor program.
Computer vision plays a huge role in our Autonomous program for sensing our Team Shipping Element and placing the block on the correct level. We use Vuforia and TensorFlow to help us with this. After inputting multiple videos and images into the TensorFlow program, it was able to identify where the block was. We created some code that uses a webcam to scan the field from left to right and assign every pixel a number. If it sees a pixel in a specific range, it will recognize that as being on one of the blue tape squares, and then assign it a lifting number. This lifting number is given to the robot and it will tell it to move a specific distance and lift the arm to a specific height. Getting the computer vision to work at first was a lot of trouble, but once we started getting the hang of it, it was easy to expand on it. We tried using a gyro sensor and distance sensor, but decided it was taking too much time to get them to work, so we didn’t use them.
Outreach:
RoboGOATS has had multiple different opportunities for outreach within our community that we’ve used to promote FIRST and teach others about robotics. Our first year in 2019, formerly known as the Omega Squad, was focused more on learning the basics of FTC and how to build and program a working robot. We didn’t do much outreach that year, except for helping out some local FLL teams every now and then. The next year in 2020, we were hit with a pandemic that limited our opportunities for outreach. We held online meetings to plan for outreach and community work. When we felt a little safer, we started to continue helping out the FLL teams again. That year, we held an online meeting where viewers could come see our robot and learn about us as a team and FIRST programs. After we demonstrated our robot, the viewers seemed very interested and started asking us many questions. It was a great way to connect with our community and learn how to present our ideas effectively. We could use this meeting as a method to practice speaking to the judges at future FTC events. Before starting the 2021 season, our team and our sister team, the Omega Squad, attended a Children’s Business Fair in our area. We had a booth with our robot and part of our field set for people to test. We talked to many people that day and got a lot of people interested in FIRST programs. This event was very beneficial to our team because we got some practice talking to others about our team, and we built up some relationships with our community. At the start of the 2021 season, we were given a robot from the Seattle military to fix. We tried numerous times but couldn’t find a solution. Although we weren’t able to accomplish this task, it taught us about the uses of robots in the real world and problem-solving skills.
Lego Robotics Classes:
Over summer a member of our team partnering Omega Squad(Team #18015) did a lego robotics class teaching how to build EV3 robots and program using EV3 block programming. For one week straight we taught seven kids ages 7-12 for 2 hours a day how to build a simple base robot following the EV3 Mindstorm steps and program it to do basic functions such as moving forward and turning. We later taught them how to use different sensors such as the color and touch. They used the color sensor by sensing what color is in front of them and doing an action based on that color. They used the touch sensor by sensing them touching the sensor and doing an action based on that. On the very last day, each student programmed their robot to go through a maze made out of cups by using their skills with the robot, color sensor, and touch sensor.
Over summer a member of our team partnering Omega Squad(Team #18015) did a lego robotics class teaching how to build EV3 robots and program using EV3 block programming. For one week straight we taught seven kids ages 7-12 for 2 hours a day how to build a simple base robot following the EV3 Mindstorm steps and program it to do basic functions such as moving forward and turning. We later taught them how to use different sensors such as the color and touch. They used the color sensor by sensing what color is in front of them and doing an action based on that color. They used the touch sensor by sensing them touching the sensor and doing an action based on that. On the very last day, each student programmed their robot to go through a maze made out of cups by using their skills with the robot, color sensor, and touch sensor.
Team RoboGOATS 16113